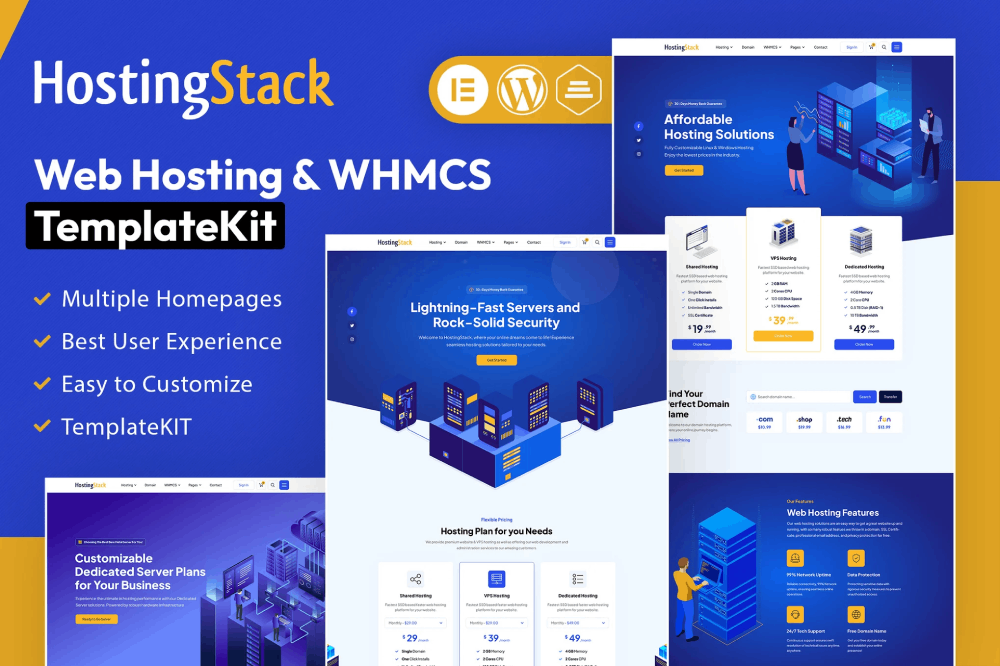
HostingStack is a modern and professionally designed Elementor Template Kit tailored for web hosting companies, cloud service providers, and domain registrars. With a clean, structured layout and high-performance design, HostingStack empowers you to build a powerful online presence with ease.
This kit includes purpose-built templates for showcasing hosting packages, VPS plans, shared services, domain tools, and client testimonials. It also features reusable UI elements like pricing tables, FAQ sections, and contact forms giving you everything needed to communicate your offerings clearly and effectively.
This is not a WordPress theme. Template Kits include page content for the Elementor page builder. This kit is optimized for the free Hello Elementor theme but is compatible with most themes that support Elementor.
** Features**
- True no-code customization with drag and drop visual builder
- Customize fonts and colors in one place or fine-tune on individual elements
- Modern, professional design
- Fast-loading
- Works with most Elementor themes.
** Templates Includes**
- 03 Home Page Styles
- Header Style
- Footer Style
- Shared Page Style
- Reseller Page Style
- Dedicated Page Style
- VPS Page Style
- About Us
- Testimonial Page
- FAQ Page
- Blog Page
- Single Page
- Comming Soon
- 404 Page
- Contact Page
** Required plugins installed with kit**
- Elementor
- Elementor WHMCS Elements
- Jeg Elementor Kit
- MetForm
Template Kits are Different from WordPress Premium Themes.
THIS IS NOT a WordPress Theme. Template kits contain the design data for Elementor only, and are installed using the Envato Elements plugin for WordPress or directly through Elementor.
Here are steps to successfully install a template kit:
- Click the “Download Template” button to download your kit.zip file. Once downloaded, do not unzip it. If you use Safari browser you may need to ensure “Open safe files after downloading” is disabled in the browser preferences, to avoid automatically unzipping the file after download.
- In your WordPress Admin, go to Settings > Permalinks and ensure “Post Name” is selected
- Go to Appearance > Themes > Add New and ensure the Hello Elementor theme is installed and activated. Hello Elementor is one of the best themes for use with Elementor, not because it is pretty, but because it gives 100% compatibility. Installing This will prompt you to install Elementor if you haven’t already.
- Go to Plugins and ensure Elementor and “Template Kits Import” by Envato plugins are installed and at the latest version. If your kit requires Elementor Pro, it must be installed now and connected to your account.
- Go to Elements > Installed Kits and click Upload Template Kit Zip (or click your kit to view it)
- Check for the orange banner at the top and click “Install Requirements” to load any plugins the kit uses.
- Click the “import” button on the Global Kit Styles first. This will setup the site settings with the right fonts and preset .
- Click Import on one template at a time in the order shown. These are stored in Elementor under Templates > Saved Templates and are re-used from here.
Building Your Header and Footer
If you have Elementor Pro:
Go to Templates → Theme Builder.
Import or open the Header template.
Click Publish → Add Condition → Entire Site (or specific pages).
Do the same for the Footer.
If you’re using Elementor Free:
- Install and activate Elementor Header & Footer Builder plugin.
- Go to Appearance → Header Footer Builder.
- Create a new header, select Elementor Canvas and edit with Elementor.
- Insert the imported Header template from Envato.
Assign it to the entire site.
Repeat for Footer.
Creating pages
- Go to Pages and create a new page and click Edit with Elementor
- Click the gear icon at lower-left (or Top-center) of the builder to view page settings and choose Elementor Full Width and hide page title.
- Click the gray folder icon to access My Templates tab and then Import the page you’d like to customize.
- Once you have built your homepage, you can set it under Settings > Reading by selecting “A Static Page.”
Detailed Guide